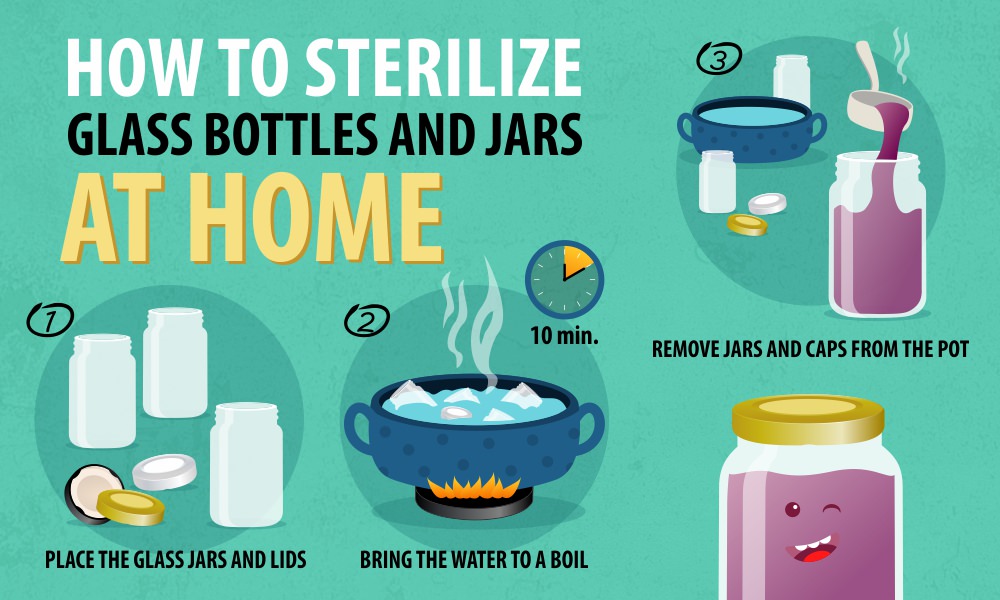
How to Sterilize Glass Bottles and Jars

Sterilization is an important step for food and beverage canning. If you are making pickles, jams, or canning vegetables in a glass jar, you must sterilize the jar prior to filling in order to avoid contamination by microorganisms. This step also helps remove any dust or foreign particles the jar may have collected during warehousing and transit.
When your glass jars order arrives, always clean and sterilize them using a hot water bath. The jars may “look” clean, and it may even come in a plastic shrink-wrap, but sterilize them with boiling water anyway to ensure cleanliness. Simply put, you can’t control what the jars have come in contact with during manufacturing, warehousing, and transit to your front door. Best of all, this sterilization process only take about 10 minutes to do.
If you are canning them at home, your natural place to sterilize your glass jars is your kitchen. There are many how-tos on the Internet that can be effective, but the method we would recommend here is the “boiling water on the stove” method, which is widely practiced and easy to follow. All you really need is a large pot and water!
That’s correct, you do not need any fancy detergent or cleaning agents. No special chemical cleaners or wiping methods. The temperature of the boiling water will take care of the sterilization for you. Besides, nothing beats a good home canned fruit jam with glass jars cleaned by boiling water! So let’s get started. Here’s how to sterilize glass jars and glass bottles:

How to Sterilize Glass Jars
- Place the glass jars and lids (We recommend metal caps with plastisol liners for the job. While some plastic caps made with PP plastic can withstand the boiling water, the lining material often isn’t a good fit for this type of temperature) in a large pot, fill the pot with water, enough to submerge the jars with at least 1 inch of water.
- Bring the water to a boil. Start a timer and let it boil for 10 minutes, make sure the jars remind submerged in the water throughout this time.
- Remove jars and caps from the pot. The jars and caps are now sterilized and ready to fill. Make sure you fill the jars while they are still warm. If the jars cool down to room temperature, make sure you sterilize them again.
Commercial Sterilization methods
While this step-by-step method will work for most home-canning applications, sterilization at a commercial scale is quite a different story. After-all, it’ll take quite a bit of time (any energy) to boil thousands of glass jars in a pot. Many commercial fill lines have automated machines that sterilize jars via pressured steam (or other methods). So when your tasty pickle and jam get the attention of big box retailers and you need to scale production, make sure you chat with a product filler or packaging expert to find out what your options are.
Let’s get canning
The most popular glass jars for home canning are perhaps the “Ball Mason” jars or “Kerr” jars. But do you know that there are many other shapes and options, made in the United States, that you can choose from? Take a look at our catalog, and let’s get canning!

I cannot find how to store sterilized bottles until ready to use
Only use sterilized jars that have been processed in boiling water for 10 min immediately before canning. Otherwise they are not sterile